Translate

Friday, March 22, 2013

Featured Blog Friday - Late Victorian English Manor Dollhouse: 1/12 Miniature from Scratch

I know I suck and I fibbed about things being back to normal but my job is killing me, I have been falling asleep in my clothes almost every night when I get home so I am really sorry. Now onto our featured blog...

Late Victorian English Manor Dollhouse: 1/12 Miniature from Scratch 


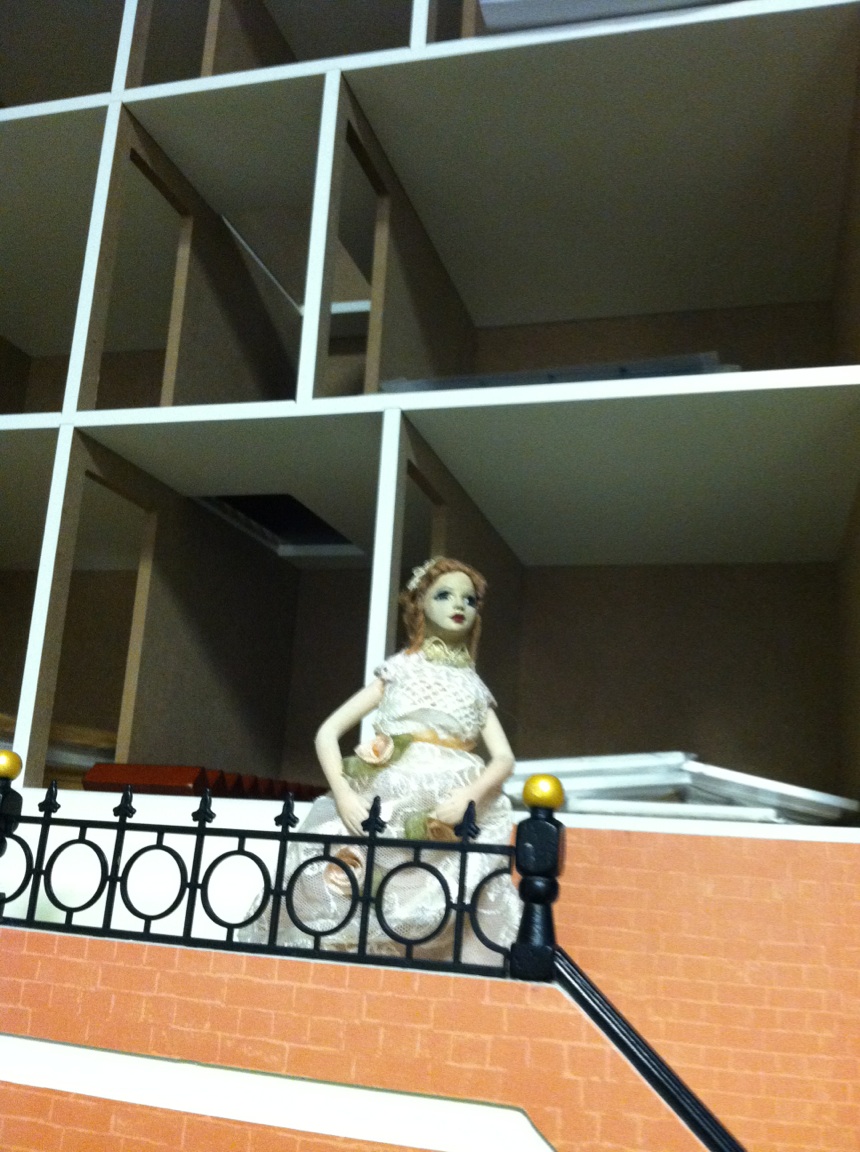
Yep the owner of this blog Gaic is building this amazing dollhouse from scratch! He started the blog in June 2011 after starting the scratch build of this Miniature Manor in Aug. 2010. Being a miniaturist for a long time he had previously made 3 kit built houses and decided it was time to give the scratch built ago. He put allot of thought into the flow and layout of this dollhouse. It is a large dollhouse which sometimes can tend to seem a little dis-jointed and off as you go from room to room but not this one. You can picture yourself being inside this dollhouse walking from room to room and living there. He shows you the step by step of the rooms and how he is doing things. Now jumping ahead to 2013 he is starting to plan the outside facade so it is a great time to jump over and become a follower if you are not one already. Here is the link to jump on over there http://englishmanordollhouse.blogspot.com/ - as always why are you still here???

Thursday, March 14, 2013

Away I went...

I am so sorry I have been away all week I got called out of town first thing Tuesday morning for work and for some reason I couldn't get into my blog to let you know till now :( but anyway everything should be more back to normal (or at least normal for me lol). Again I'm so sorry I miss you guys so much!

Friday, March 8, 2013

Featured blog - Modern Miniatures Witledge-berguss


Here is what I find amazing about Ray (the blogs owner Ray Whitledge) he is one of the kindest people. Not that I haven't met a lot of nice people since finding blog land don't get me wrong, its just that I have been fascinated by his work for years and years. I pray to have just a pinky's worth of his skill and imagination.  I guess I was thinking that someone that talented wouldn't really give me the time of day, but he responded to my email and we have exchanged a few since then an OMG so nice. Any who on to his blog - he started it in Dec. 2011 and is doing a project for himself. It is a doll house from the Lawbre company (if you haven't seen there houses check them out) its The Chessington Plaza designed by the late Dan McNeil. It has four floors, opens on the side and front. This place looks massive! For some reason however it was made with only 10 inch ceiling so it makes Rays work a little tougher. He is doing what I would say is a mixture of modern and antique. Like a home a very wealthy person with very good taste has(not that I know any lol just going by what I have seen in interior design mags) What he does in his blog is show and tell through everything he is doing and how he does it. His wood floors, wall panels, railings, kitchen and everything else is amazing. This man can do some stuff with some jewelry findings. He shows you what he uses, where he get it, so even in his blog his detail shows through. He is like the McGuiver of dollhouses! For my non English followers McGuiver was a sitcom and the man could make anything with a tooth pic, gum, an a rubber band. What is completely shocking to me is there are only a little over 300 followers. All I can figure is a lot of people don't know hes blogging or something. When I found the blog it was like Christmas morning so I cant imagine someone going there and not following. If for some reason you haven't seen his blog click on this link http://modernminiatures-whitledge-burgess.blogspot.com/ and go there I'm sure you will become one of his faithful followers. If you are a follower but haven't visited his blog in awhile go check it out again! As always I gatta say it lol You are still here why? Have a great weekend everyone!

Wednesday, March 6, 2013

New Stuff the unveiling


So here are all the House of Miniature kits I got off of EBay. 17 kits total from 3 auctions. I believe I ended up paying about $85 give or take - in the pic on the left the first 3 kits going down are doubles. The last pic is my cat Prissy getting in the bag that I pulled them out off lol
the stacked ones on left are doubles
the rest of the H.O.M kits

Prissy my strange cat

Now let me explain this last thing. I was on EBay looking for a doll because my mini club is doing a doll and dress. Then I saw this 1/6 scale big headed doll (Pullip Nomado) an idk what it was but I liked her and after some research found out they are very collectible an a good investment. I paid 1/3 of what she sells for and the seller was amazing and sent this extra stuff with her that she could have sold for $50 or more. The little shoes kill me lol and the last outfit I hand sewed  for her before I even won her while I was laying in bed sick. When I was doing my research I watched some YouTube videos on them and some of those people - all I can say is OMG k-a-r-a-z-e. I think I sat there for 30 min with my mouth hanging open! Anyway gatta run. Till next time :)
Nomado made in Feb 2004

The free stuff

One of the two pairs of free shoes

outfit I made her


Tuesday, March 5, 2013

How to: Cork floor and other things


Sorry I have been M.I.A. for a little bit I have been really sick (still don't feel so hot) but here is a quick update on everything - 3 H.O.M. kits have arrived and 14 should be here today (still haven't gotten hold of the canopy bed *pouting face*. I will show you what I got when I have them all here. On the new house some pieces did get cut this weekend (wanted to do more but was just to sick) Will show pics when it starts to look like something lol. I also ordered something else not going to tell you yet, show and tell when it arrives, and ya I be broke now lol. Hoping to order the doors and windows for the new house in the next couple weeks have to see how funds are. Oh and if anyone has a blog they want featured or know of a good blog just send me a mssg about it otherwise I will just keep picking. Also if you have a tutorial you would like featured hit me up about that also. I really want this blog to be about and for everyone thanks! I will stop blabbing now and onto-

Cork Floor :

 You will need:
matte board or cardboard
2 sheets of cork( I am using were bought at the craft store in the scrapbook paper section)
sandpaper
ruler
pencil
sealant to finish floor (your choice)

I picked a light and a dark cork sheet, but you can do all one color.  It has a backing that you peal off and then its sticky (just like a sticker). They were only a couple bucks a piece.The room I am making the floor for is 7 x 14 and once I got it made I still had some of the cork left over.
1.So measure your room and cut out your matte board to size.

2. Figure out how large you want your squares to be, I made mine 3/4 of an inch. Then draw out your squares on the removable paper backing.

3. Next your going to figure out how you want to lay them in the room and draw the pattern on the matte board. 4. Now the fun part - start laying your floor. Just peal off the backing as you go no glue needed!

5. Once you have all your pieces laid you can sand and finish how ever you want. I just put polyurethane on mine. I would suggest that after its dry you put your floor under some heavy books for a couple days but that's up to you! The good thing about this cork is you can really butt the pieces up next to each other since they are not real hard.

Thursday, February 28, 2013

Featured blog Friday - Merriman Park

outside facade of Merriman Park

Doing a feature on this blog stumped me a little only because having to pick just a few pictures to show you was very hard! Everything in Merriman Park so far is beautiful. The floors,walls, furniture, artwork, wallpaper... I really could go on and on but as we all know we can only add so much into our posts before it wont let you anymore. Anyway, the blogs owner John started his blog and his dollhouse in December 2009 as a project for the very cold Minnesota winters. He swears he lives in the middle of no where Siberia (he hasn't seen where I live - there be nothing around here boys and girls) John is multi-talented, you will find out as you read his blog and has had a few outlets along the way for his creativity. Keep in mind I have read this blog from start to finish several times (Hello my name is Tina and I'm a blog stalker jk) I love his work and he shows you the processes he uses to get things done. You even get to read about the things that give him a little trouble (electricity) so you know he is human like the rest of us (so we don't have to hate him lol). Also his personality really comes through in his blog, he is really funny. I wish we lived in the same Siberia we would so be friends. I also wish I had a Santa like his, John is very lucky man as far as the gifts his partner gets him, the stuff is awesome.  He has been away from his blog for about a month or so do to personal things but he is getting ready to jump back into it (lucky for us). Every time I think about his blog I think Pretty Pleater and I laugh, you will so see why once you start reading. He has so made me want one though (another thing on my list) just wait till you check out his curtains (big sigh) Yes I'm jealous, in love and in awe of his work. That's saying allot because those are not normally traits of mine. I'm going to wrap this up here by giving you this link http://john-merrimanpark.blogspot.com/ You really will enjoy this blog :) and as always your still here why?


Make sure you read the post that goes with this pic!


Wednesday, February 27, 2013

Artwork and canvas

Artwork by Carl Wood

Let me just start by saying that we are having our roof replaced today (it was suppose to happen yesterday when I was at work but it rained) and omg all the banging my head is going to explode! Somehow our power got knocked out this morning and just now came on (thank god my phone and kindle were charged) so I haven't done much today other then yell at the dogs to stop barking an no that didn't work (very disturbed face) Now my computer is acting like its on crack and keeps freezing IDK if its because it was on when the power blew (i hope it stops) however it did give me time to work on some mini canvas that I have been telling my dad I was going to give him so he can make me some mini painting. See I want a little something in my dollhouses from the people I love and with my father being a painter its a bonus for me. With that being said I was going to put some kind of art room in my big house even though the idea never really meshed into what I want to do with the rest of the house. Now that I am doing the other house however it will be perfect for the little attic. If you like the couple of paintings I'm showing you here you can see some more of his work by clicking this link - https://www.facebook.com/media/set/?set=a.1071920653115.10098.1679123082&type=3. An yes he sells his work if you are interested and does commissions. Anyway I finally got around to making some and there almost done. If you want to know how they are made let me know otherwise I wont bore you with it. I want to make a few more for myself because our styles are a little different from each others and it will give me some variety but at least I can give him these to get started on. That's about it for today boys and girls, I hope you all have a good one!


the canvas I made
Artwork by Carl Wood

Monday, February 25, 2013

Cardboard, tape,pins, a baby and a thank you

Riley helping

So the guys were all ready to cut things out for me yesterday however I was not. The washing machine decided it wanted to not work so I had to fix it and clean up all kinds of water. Not fun. Then they were drinking again. I wasn't ready then either so didn't matter. Now cutting of things will have to wait till next weekend but that's OK I'm still working on the mock up. My mini helper came today and this is how it went....
After 5 min." can we take a break yet?"
he likes him some break time and so does Bobbi Joe
So far...
So the roof angles are driving me crazy but I think I have it figured out. The windows and door are the cut out sizes of the ones I plan on getting. They are cut out of card stock for my mock up so I can move them around. I still have to find a window for the top that's why one isn't there yet. I have the ceiling in on the inside but no walls yet because I'm throwing some angles in to get rid of the box feel. Its going to be 5 rooms not including the hall an small attic space. This week I have wire coming and my father in-law is going to teach me to solder so I can do flower boxes on the windows and railing on the stairs. I also have about 15 House of Miniatures furniture kits coming. I want the canopy bed from them so bad but keep getting out bid :( I'm going to be a busy girl though. Now onto my thank you - I want to thank everyone that has started following me you have no idea how much it means to me and you are all so nice. I am starting to put thought into a 50 followers giveaway. An I know I normally put a small project on here on Tuesdays but I have to skip it this time I'm really sorry I'm just slammed. Sorry :(  I will update soon with everything else. Thanks again everyone y'all are great!

Saturday, February 23, 2013

So frigging excited! I love men!

World of Interiors 1994
I have had this pic don't know from where
No I don't mean that I love men in a whore kinda way lol but I live with 4 men, 1 of them is rarely here. The other 3 are upstairs getting there drink on (jaguar bombs and beer) and I'm the only sober one in the house excluding the animals. Which all of that is normally an oh god kinda night unless I just break down an get my drink on with them, but I have had some thoughts rolling around in my head for a week or so and decided to see if I could get the mens to help me out with some things. So I have found that there drunk time is a great time to ask for help with things that I am not that good at. Number one being power tools an 2 being the CAD program. So what do those two things have to do with whats in my head? Easy a french chateau-ish style dollhouse. Why am I thinking about this? Easy - there is something about the cottage that's just bugging the crap outta me. I'm not feeling it, I have tried. It was pretty much free, I would not have gotten this kit myself. I told the mens they could blow it up if they helped me, don't gasp. I would gladly exchange it for what I want. So I found this pic as a kinda idea and we are going to dumb it down some. Off to home depot we are going tomorrow an I have some research to do. I only want it 2 stories an a small attic. They think they can get all the main things cut for me tomorrow. I'm doing a little happy happy pee pee dance! I know, I know I already have a huge very nice doll house I should be working on but if you think about it its the same as what I have right now going on but I will like it more :) anyway I will let you know how it all goes! Peace!

Thursday, February 21, 2013

Featured blog Friday - Doreen's Miniatures and Memoires & Doreen's Miniature Projects

Doreen's Miniatures and Memoires
Yes there are two blogs I am featuring today but they are both by the same owner. With that being said I didn't want to feature one without the other, also I follow and like them both! Doreen just recently celebrated her 70th birthday!  We should all give a shout out just for that! Doreen got her first dollhouse in 2005 and I'm sure you can guess what happened, yep into the wonderful hobby she went. Now lets start with Doreen's Miniatures and Memoires. This blog is about her dollhouses as well as her life. It has great pictures and shows the projects that shes doing so you can see and read about the progress of things. I don't know about you but I like seeing what others are doing and how they go about it. If you are like me this blog is for you! Click on this link and it will take you there http://doreensminiatures.blogspot.com/

Doreen's Miniature Projects
As for her second blog Doreen's Miniature Projects, she hasn't had a chance to do much on this blog in awhile but there are allot of great projects! Whats better than that you ask? Well she tells you how to do these projects yourself of course! The things she makes on there are to frigging cute!You can click on this link to go there http://doreensprojects.blogspot.com/

Now like I have said before why are you still looking at my blog?
Doreen's Miniature Projects

Monday, February 18, 2013

Letter/Key holder tutorial

When I was little my grandfather one like this in his house. He made his it was stained wood and it had roosters on it. Not girly like this little one I made but it just goes to show you how the same thing can be changed so much just by the way we decorate it., and the things people make have a part of there personality in them. He used to make all kinds of things, mostly with a country flair. I wish he was still around now, but this is kinda my little tribute to him. I miss you grandpa. Now enough of my blabbing and onto the tutorial...


Letter/Key holder


Supplies -
Mattboard (you can use basswood or wood of your choice but it needs to be 1/16")
Glue
Toothpicks
Sandpaper
Large safety pin or needle
Craft paint (stain if you are using wood and want it stained instead of painting)

Cut mattboard -
1 back piece 2" x 1"
2 side pieces 1 - 1/2" x 1/2"
3 shelf pieces 1" x 1/2"

Round all the edges on your back piece, then use your needle to make one hole at the top center and 3 holes straight across the bottom. Sand two corners (on the same side) of each of your side pieces. Sand a 45 degree angle on one side of each of your shelf pieces. Now glue your side pieces to the back (rounded side out). Once that is dry glue your side pieces angled side down starting 1/4 of inch up from the bottom, then the next two every1/2 " above the one below. Let dry. Now cut your toothpicks 1/4" at the ends (you want to use the ends because its easier to put in the holes you made). Dip the pointy end of the toothpick in the glue and push into the holes you made in the bottom of your letter holder. Do this with all 3. Glue the holes behind as well just to strengthen the hold. The hole in the top is to be able to hang it. Once this is all dry decorate, paint, stain, embellish as you would like. :) If you have any ?s just let me know. 

Sunday, February 17, 2013

A few words and more work done on the cottage...

I just wanted to thank everyone for following me and all your comments. I really appreciate it, thanks so much. It means more to me than I can even say. Also to Caroline thanks again for mentioning my feature on you on your blog!

 Now on to the slow but steady progress...


I still have to make all the flower boxes for the windows and a whole bunch of flowers for them and the beds. The grass, walkway and add more moss to the roof.

Then I will see what else needs to be changed/added and move to the inside. I'm still not very happy with the trim color but Ive changed it 5 times and I think I can maybe live with this, at least until tomorrow lol. Still haven't thought of a name for it. Any suggestions? Its 3 am here and I am beat so I'm out but ill be back Tuesday with a tutorial on a letter holder. Night :)

Thursday, February 14, 2013

Featured Blog Friday


 Today I'm going to feature a blog on Cinderella Moments.


If you have not seen this blog yet let me tell you her dollhouses are little works of art! You don't just have to look at her doll houses either, you can own one! Yes that's what I said you can own one of these little dreams by jumping over to her Etsy shop!

 Not only does she have her houses for sale there but there are mini paintings and other cute items if your searching for that special thing for a doll house or room box you already have. I'm not kidding though these houses make me drool. What could be even better than that you ask? The owner of said blog and Etsy shop Caroline is super nice! She also does commissioned houses if you don't see the one you are dreaming of already made in her store. Want to try and make one of her little dreamy houses? She sells a book with photos and directions for that also. With all that said why are you still looking at my blog? Jump over and check out Cinderella Moments its very early Fri. morning here I haven't slept yet and i have a mini club meeting in 9 hours so I'm out. Enjoy Cinderella Moments!

Happy Valentines Day <3

The hubby gave me these! I hope everyone has a great day!

Tuesday, February 12, 2013

Mini Tutorial Tuesday

On Tuesdays I'm going to try and  do a small tutorial. I might have to miss some depending on whats going on but I will do my best not to. Now on to the tutorial -


Small Hip Bath

you will need -
  1. a clean oval type lotion bottle
  2. box cutter or sharp heavy duty scissors
  3. super glue or model glue
  4. embellishments (stickers, trim)
  5. jewelry findings or beads (for feet if you choose to have them on yours)
  6. sand paper
  7. craft paint
  8. tape
Its always good to look up pictures of the item you are making on the Internet. Ive made this type of bath before and knew I wanted a curvy kind of shape. First measure the width of your bottle and mark it out on paper. Draw the shape you want on the paper, cut it out and tape it to your bottle. Cut along the line and repeat on other side. These bottles are very slick so you want to sand it down really well and make sure to get your cut edges also.Now you can embellish the rim to have a nice finished edge (I also did near the bottom of mine). Now you can paint your choice of colors. It does work better if you do thin coats letting it dry well and lightly sanding in between. You can put stickers on when its dry or decals look nice also. You can even do some decoupaging on it. I chose to have feet on mine, you don't have to if you don't want to. Plenty of hip baths didn't have them. For my feet I used jewelry finding I had laying around but you can also use beads. Mark your 4 spots your feet will go and glue down. Now you have your hip bath! Back in the good old days these baths were filled using pitchers of water so you dont have to but if you want you can make hot/cold nobs out of beads and a tap out off another piece of plastic or a pierced earring finding. You can attach these to the wall or the end of your bath. I hope this was helpful to someone out there :)


P.S. - I also decide to make a tray to go across the bath out of some of the bottle I had left over. Just remember don't throw away your scraps because you never know what you may end up using them for. Like the straw thing that was inside you bottle, you can make cups out of it and all kinds of things with the left over plastic!

Monday, February 11, 2013

Outside on the cottage

Work continues but it's starting to get there. Will be able to put on the windows, door and porch by morning. Already have some wallpaper done in side. Slowly but surely we have progress.

Saturday, February 9, 2013

Cant sleep and clay...

Does anyone know how to make your posts longer?? This is suppose to be part of the other one but it wont let me add anymore onto it :( Anyway I couldnt sleep last night and was going to do more floors but didnt feel like it so I broke out the oven bake clay to play with it. Mind you I have touched clay since like first grade or something and I should have tried some food or something but I wanted to try and make a doll. Im sure most of you that use this kind of clay are laughing at me right now. Trust me im laughing at myself! But here is what I came up with. She is 5 1/2 inches tall and her arms are a little to long :( Floral wire,scraps of cloth, clay and craft paints and poof here she is. She is going to live in the cottage even though she told me she likes the big house. Uummm no. I dont have a doll in mind for it but all the ones I like are $400 give or take. Why cant I be BFFs with a great doll artist, miniatures artist, win the lotto. Oh well none of those are going to happen and I have champaine taste on a beer budget. Ive been looking at molds might have to go that direction. Any suggestions? Also the big house, my cottage and this little doll all need names. Suggestions welcome there also. Today im going to go work on the cottage. I need to make some bricks for the outside that im going to use in random spots, I have to wallpaper inside put the windows on, figure out what im going to do on the floors, blah blah blah. So I suppose ill go get to that now, if only the little no name doll could help im sure her long arms could help me out!